
I deal with lots of data. Constantly reviewing, auditing, and analyzing things to ensure costs are minimized and usage controlled. Part of this process includes notifying individuals and groups of errors or issues that have been encountered. This can be time consuming depending on the issues that are found. A one-minute task for an individual issue doesn’t seem like much, until you have to do a similar thing over and over for hundreds of people.
I’m hesitant to talk about my initial solution because it seems so simplistic, but I suppose the point of documenting these things is to have a record of what I’ve done, or tried doing to save time and improve processes.
Task:
Send warning emails out to 25+ people.
Issue:
Each email needs to specifically tell the user what they did, what will happen if they continue, and provide steps to correct the issue going forward.
Maybe you’re thinking: “That’s simple, why not create a generic email and Bcc all those affected?” Sure, that would be a quick way of notifying a lot of people at one time, but the issue is that the email would have to be so generalized that it would become useless. It would be like sending out a mass email to users saying, “Please stop doing what you are doing, or there will be consequences.” How many users are going to pay attention to that type of message? How many will reach back out to ask for more information? The answer is, A very low percentage of users.
Solution:
Use Microsoft Outlook Forms to create an email template
Using a forms in Outlook will speed up the process of sending out emails that are tailored to the individual users.
Create a Form in Outlook
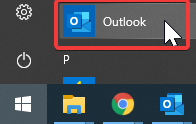
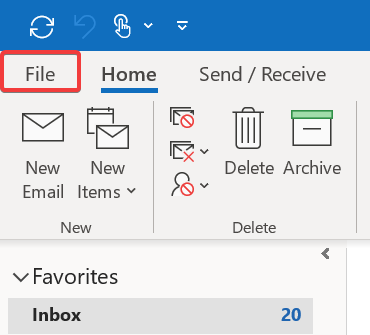
- Open Outlook
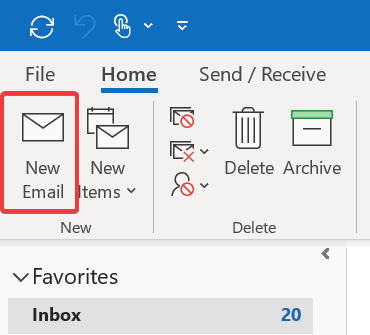
2. Click on New Email
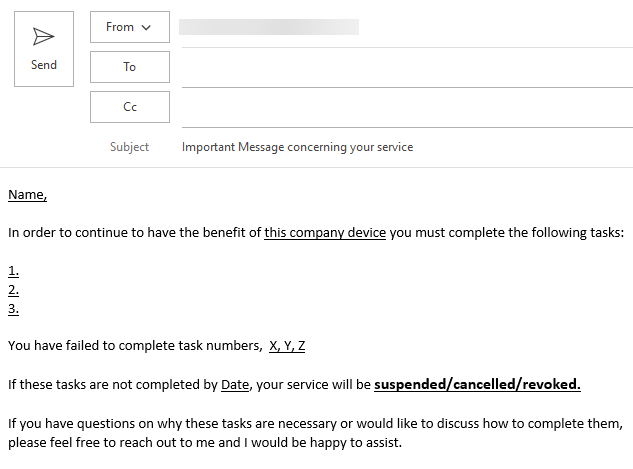
3. Create Email Template
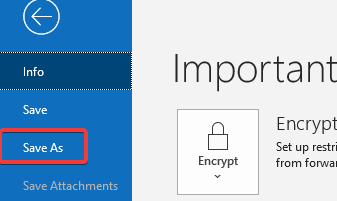
4. Once done click
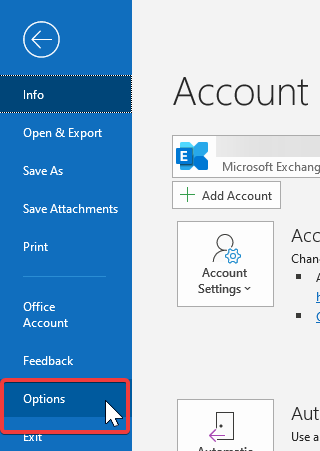
- File
- Save As

- Save As Type
- Choose: Outlook Template
- Name your template
- Click Save
Okay, now that you have the form, how do you access it and use it?
Customize Ribbon
1. Click File
2. Click Options
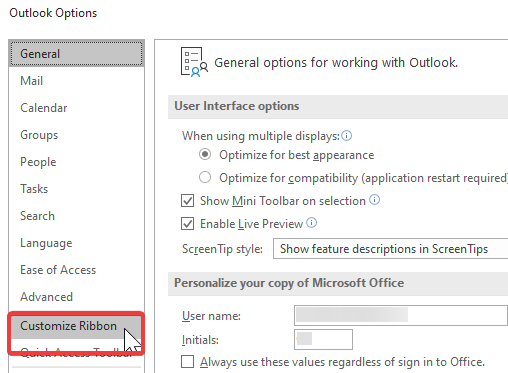
3. Click Customize Ribbon
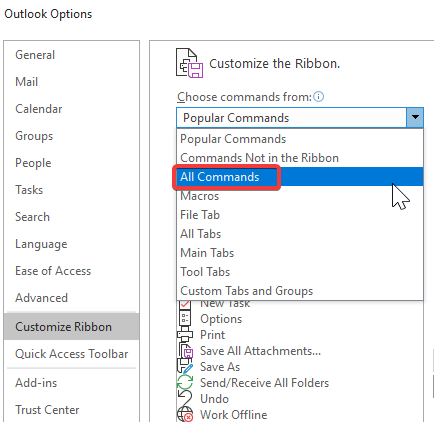
4. Click the Drop-Down
- Choose All Commands
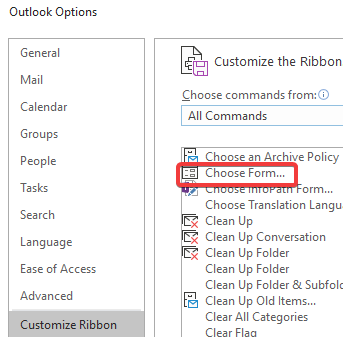
5. Scroll, Find, and
- Click Choose Form
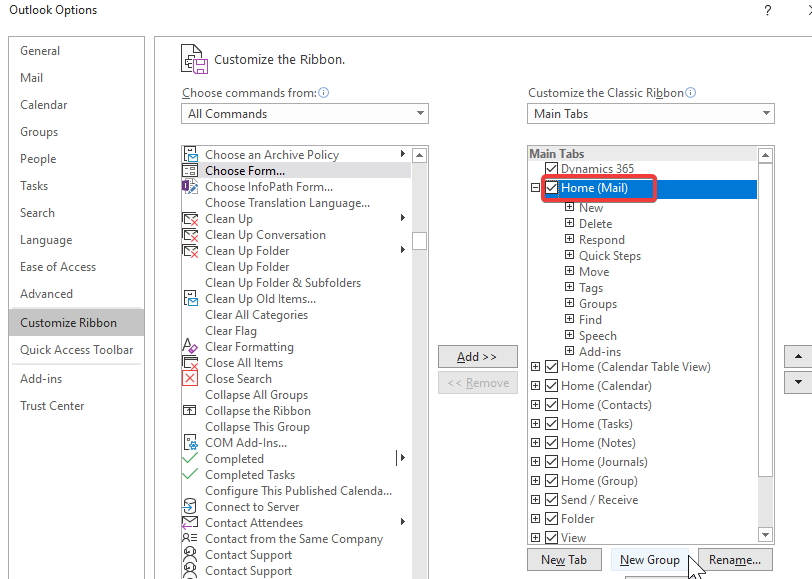
6. Click on Home (Mail)
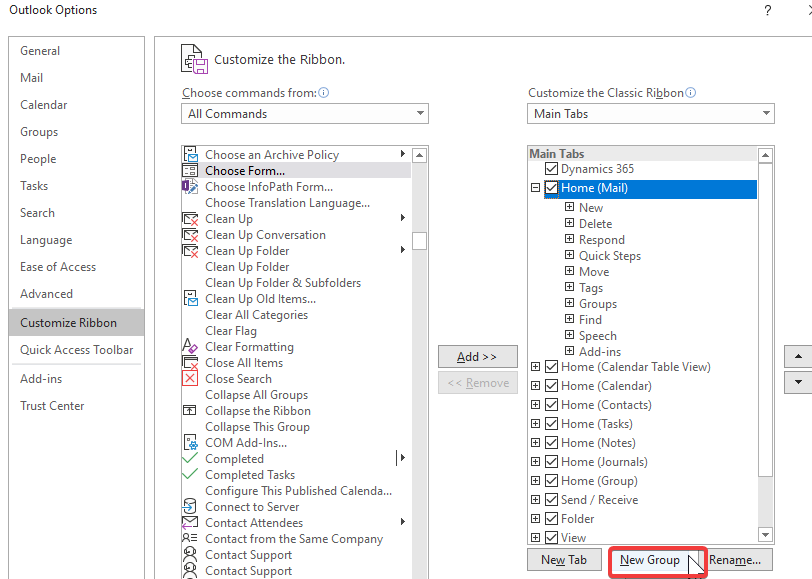
7. Click on New Group
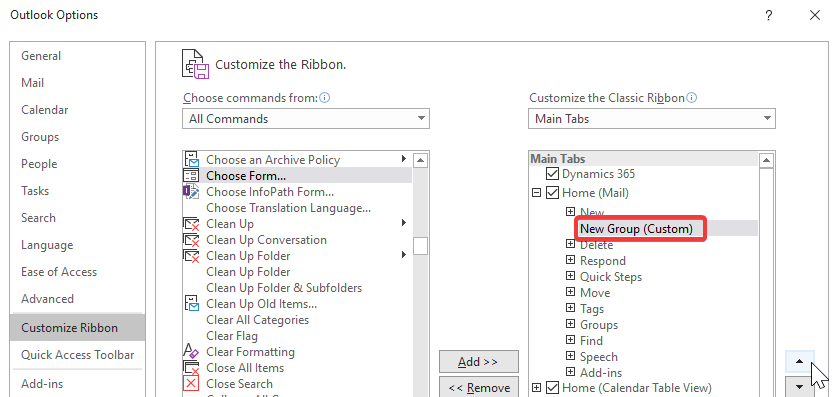
8. Move New Group up
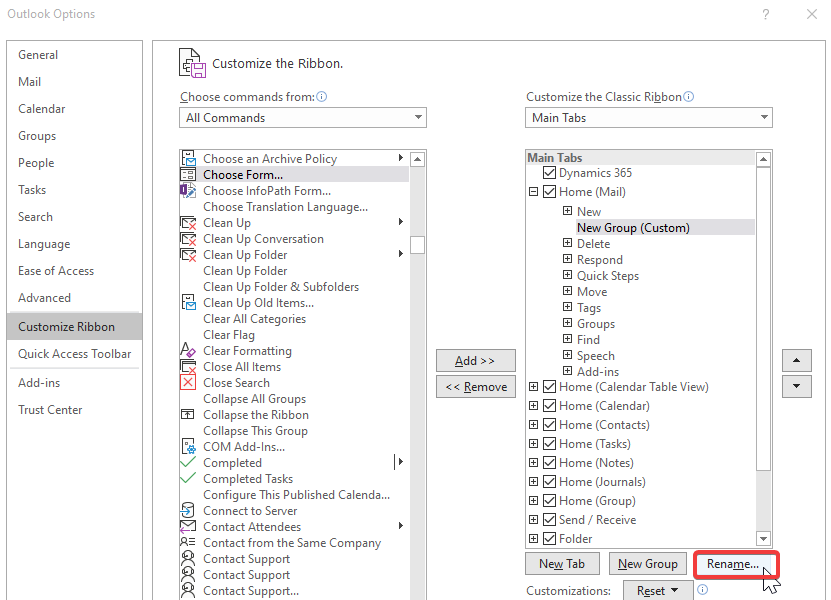
9. Click Rename
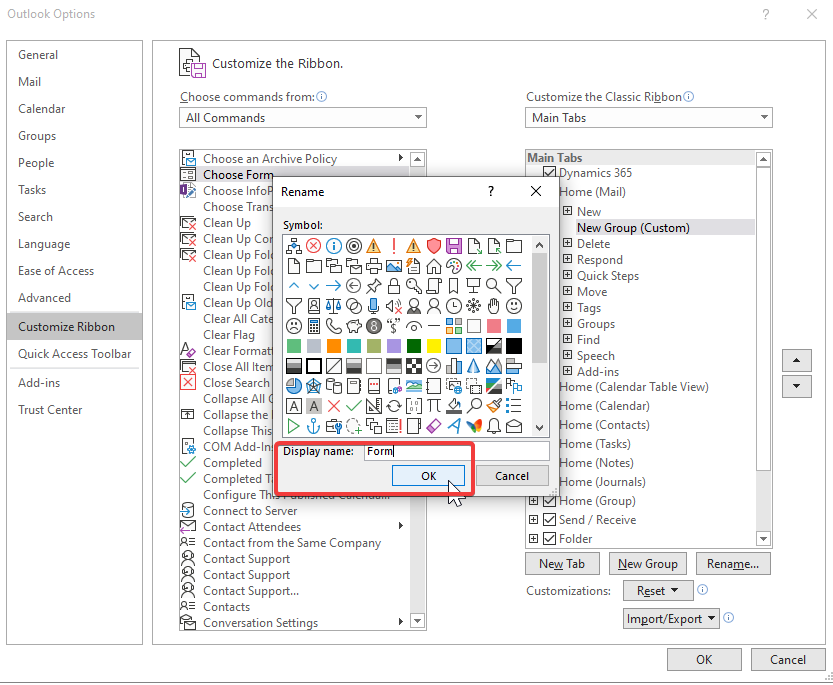
10. Change Display Name
- Click OK
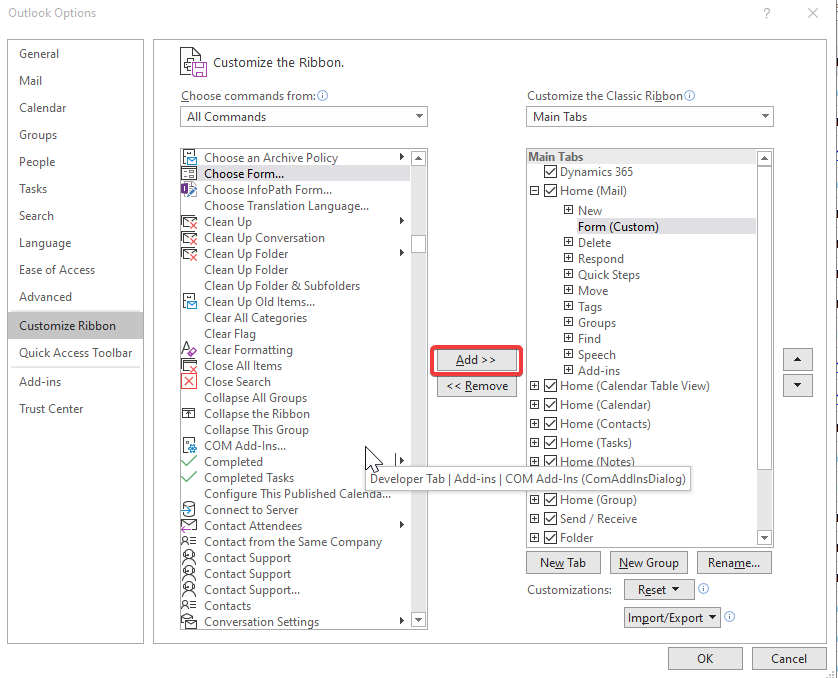
11. Click Add
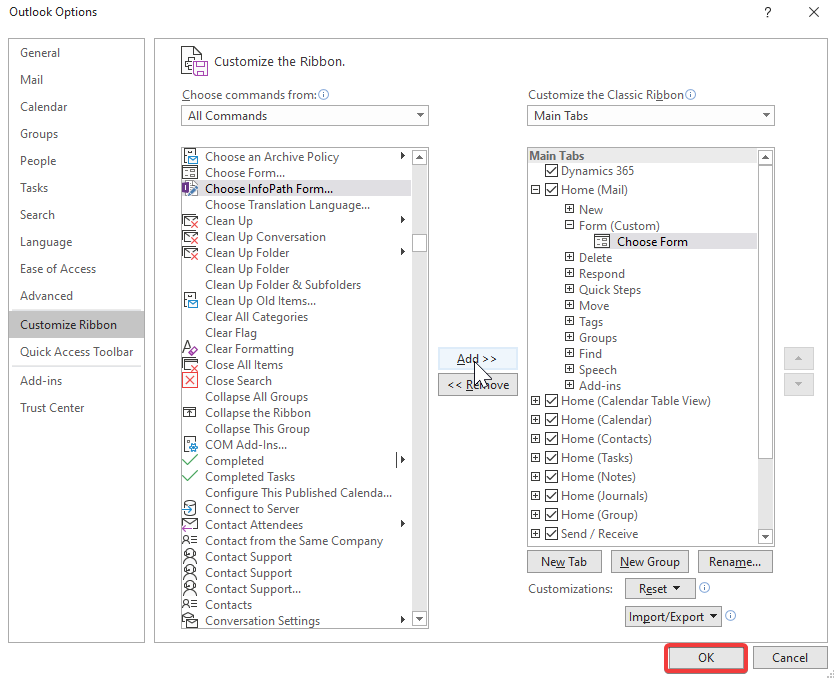
12. Click OK
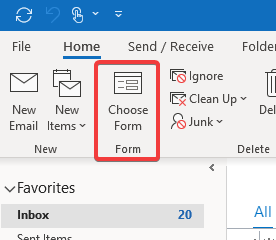
13. Form is now at the top of your Outlook and ready to use!
